PDF, Word, PowerPoint
PDF Files
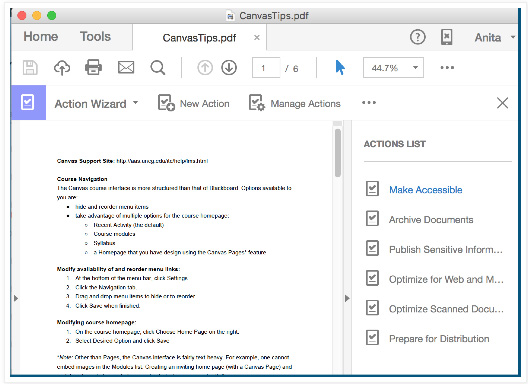
Try to avoid scanning printed documents- this often results in the pages being seen as images instead of text. Acrobat Pro has an accessibility tool that will generate an accessibility report, set alternate text, and determine reading order. You can access Adobe Acrobat’s accessibility tools either by clicking on the EDIT menu and choosing Accessibility Setup Wizard, or going to Tools and selecting Action Wizard. From the Action List, choose Make Accessible.
Images will need ALT text. This is best if done in the document’s native format, such as Word. Information on ALT text is described on the “Images in Canvas” tab above.
Whenever possible, use Word documents instead of PDF files- accessibility tools in Word are easier to work with, and Word is often more screen reader friendly.
Resource: Accessibility in Adobe Acrobat
Word Files
- Use the built-in Accessibility Checker. Click on “Review” and select “Check Accessibility.” The results of the check will appear to the right of the document.
- Follow all guidelines for accessible text, and make link text meaningful in relation to the page being linked. Use the format options for bulleted and numbered lists.
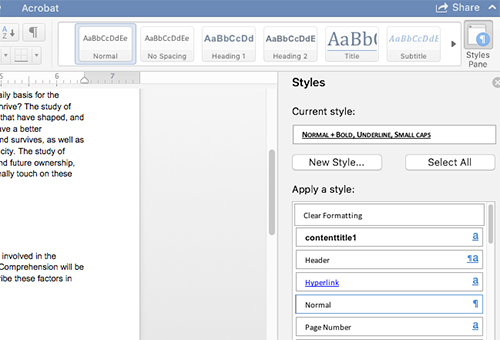
- Use built-in headings and styles: on the HOME tab, the styles group shows at the top right. You can also click the Styles Pane button to see options load along the right side of the document:
- Include alternative text with all visuals: right-click on the image and choose “Edit Alt Text…” A text box for entering alt text will appear at right. You may also see a box you can check to “Mark as decorative”- check this box if the image adds no informational value to the slide. More information on ALT text is included on this site in the next section, “Images in Canvas.”
- Ensure that color is not the only means of conveying information.
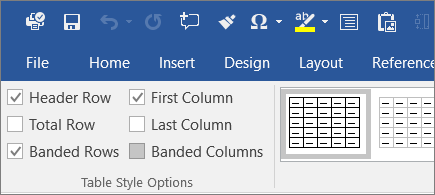
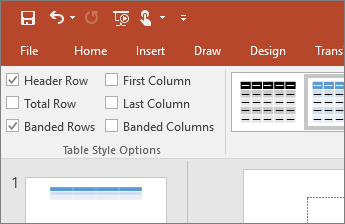
- Use a simple table structure, and specify column header information. When you insert a table, on the Table Design tab, check the box for “Header Row” if you just need to designate the top row; also check “First Column” if that will be used for heading information as well.
For detailed information on how to implement these recommendations, see:
Microsoft’s Make Your Word Documents Accessible
PowerPoint Files
- Use a slide template when possible, and follow the guidelines for accessible text.
- Give every slide a unique title.
- Apply ALT text to images: right-click on the image and choose “Edit Alt Text…” A text box for entering alt text will appear at right. You may also see a box you can check to “Mark as decorative”- check this box if the image adds no informational value to the slide. More information on ALT text is included on this site in the next section, “Images in Canvas.”
- PowerPoint has a built-in accessibility checker that will also provide suggestions. Click on “Review” and then click on the “Check Accessibility” icon. The results of the check will appear to the right of the slides.
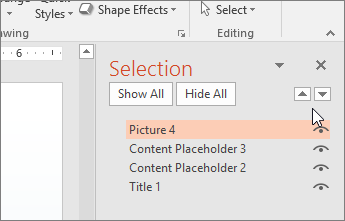
- Especially if you aren’t using a slide template, you should make sure that the items on your slide will read in the correct order (slide order). On the Home menu, click “Arrange” and then choose “Selection Pane.” This pane will appear at right and will list all the items on your slide. Drag and drop the items into the correct reading order.
- Tables- tables should have header rows. When you insert a table, on the table design tab, check the box for “Header Row” if you just need to designate the top row; also check “First Column” if that will be used for heading information as well.
- Use Speaker Notes to clarify and/or elaborate on any material on the slide that is not fully explained.
- Use captions for embedded video and provide a transcript for embedded audio. Captions for videos in PowerPoint can be problematic, so Microsoft recommends you insert videos that already have captions embedded.
- Options may be slightly different in Office 365 online.
Resources:


