Recent News
Zoom Recordings
January 19, 2021
Categories: Canvas, panopto, zoom
Near the end of Fall semester, ITS announced that our server storage space for Zoom recordings was almost full. We do not have unlimited storage for Zoom and it is filling up too quickly. ITS has now implemented a policy that ALL ZOOM RECORDINGS WILL BE DELETED AFTER 30 DAYS. Once deleted, the file will sit in trash for 30 more days, where it can be recovered if needed. After this though, the recording will be deleted forever and unretrievable.
Option 1: Download from Zoom
The first option for keeping your Zoom recordings beyond 30 days is to download them. You go to your CLOUD RECORDINGS tab for Zoom. Then, click on the name of the recording. That will open a page with two files you can download. The first file is the full recording with video. The second file is an audio-only version of the recording. You can click the Download button to download one or both of these files. If you need to share these files with students, you will then need to upload the recording files to either Box or your Google Drive. Then, adjust the share permissions for the file as needed and share the link with your students via Canvas. Note that if your recordings have any FERPA-protected information such as student names, then you are not allowed to use the recordings in future semesters.
Option 2: Backup Recordings in Panopto
Panopto is the new tool used primarily for streaming/recording classroom lectures. Note that Panopto is NOT a substitute for Zoom, as Panopto has a 30-45 second delay between speaking and hearing comments. Therefore, it does not work well for two-way conversations.
When using Panopto to store your Zoom recordings, you will continue to choose to save to the cloud when setting up your Zoom sessions. With this option, the first thing you have to do is add PANOPTO to your course left-hand navigation. Then, you have to actually click on the left-hand Panopto link once you’ve added it. This “activates” your course in Panopto and will create a course folder for you in Panopto. At this point, the good news is that all the zoom sessions you record will AUTOMATICALLY be backed up in Panopto.
NOTE: If you’ve already scheduled your Zoom sessions, that is fine. You do NOT have to reschedule after adding the link to Panopto.
The next step is getting the recordings in Panopto available to students. The links to the recordings in Panopto can be added to your Canvas course anywhere that uses the Rich Content Editor. The Panopto button in the RCE looks like a green triangle- similar to a recycling icon. You can click that and it will show you your Panopto videos:
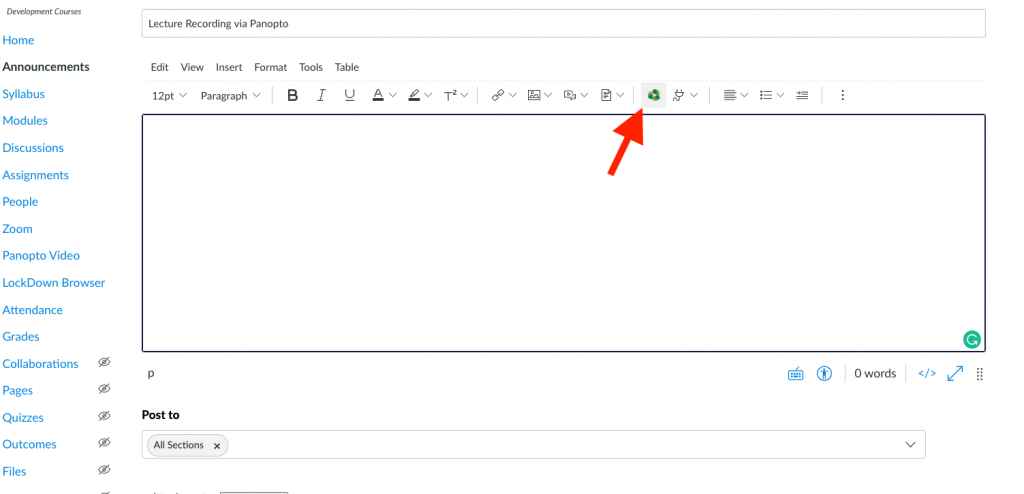
(Note that if you are ever looking for the green Panopto icon and don’t see it, you can also access Panopto under the “plug” icon, immediately to the right of the Panopto icon in the image above.)
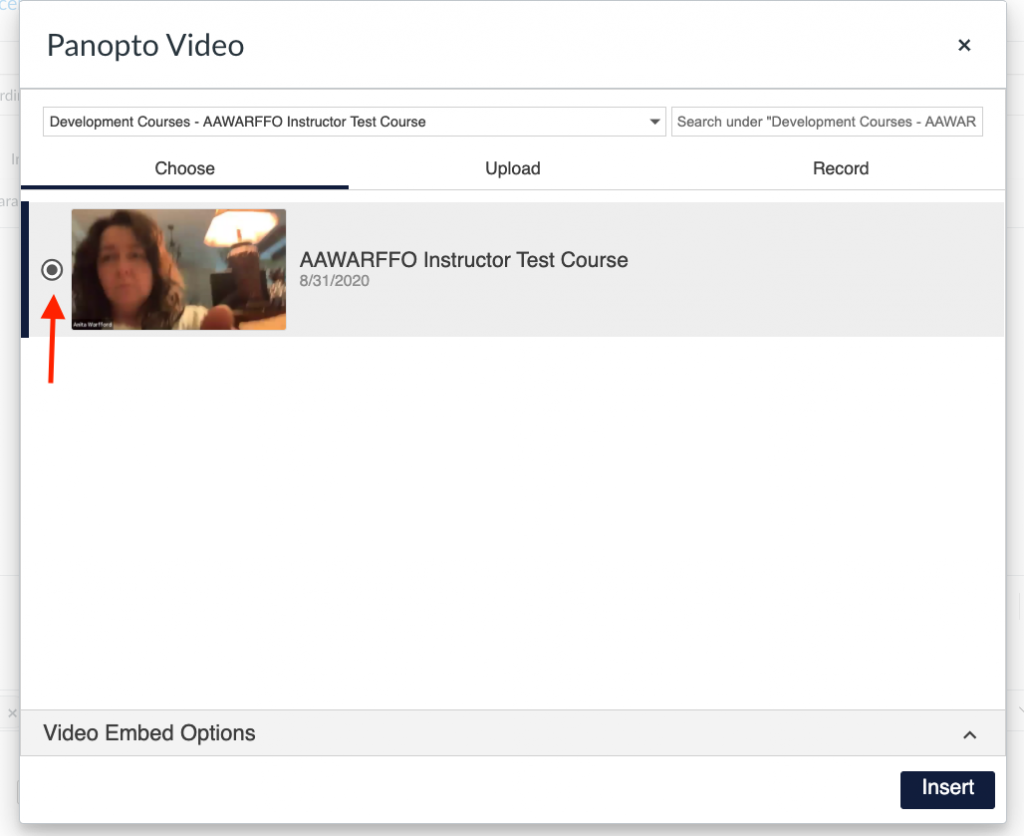
You click on the one you want, then click INSERT, and it will embed the video on the page. The good news is that if you want to use the videos in subsequent semesters, these embedded links will copy from semester to semester and work correctly.
Please note that the ITS Classroom Technologies Group provides the primary support for Panopto. You can view a brief video from ITS below that walks you through most of this process:


